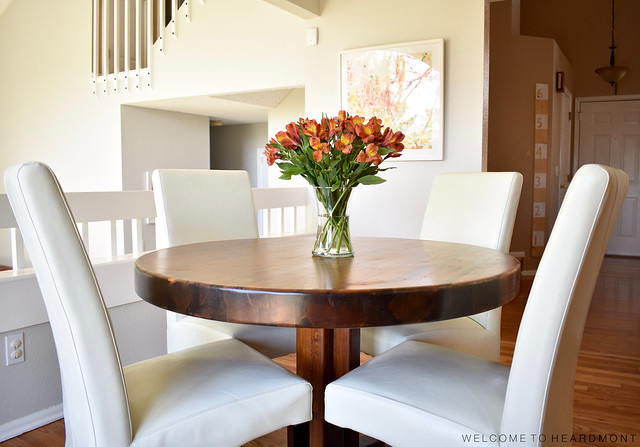
We’ve lived in this house for three years now. Pretty quickly after we moved in, we decided to nix the formal dining room and dine solely in our eat-in kitchen. We didn’t have a table that fit the space at the time, so after some hunting, we found this awesome round table at a vintage shop nearby.
This table served us well, but once the four of us were all dining at the table (instead of three with the baby in a highchair), it became difficult to serve food from the middle of the table and impossible to host friends and family for meals.
I’d been looking at dining tables on Craigslist for a few weeks with no real luck when I was given the opportunity to try a set of hairpin legs from The Hairpin Leg Co. (SPOILER ALERT: They are awesome!). We decided to order dining height table legs and make our own table top for a completely custom dining table built to fit our space.
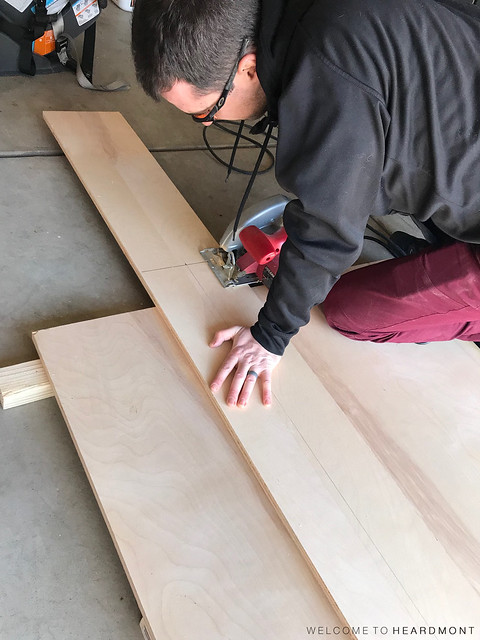
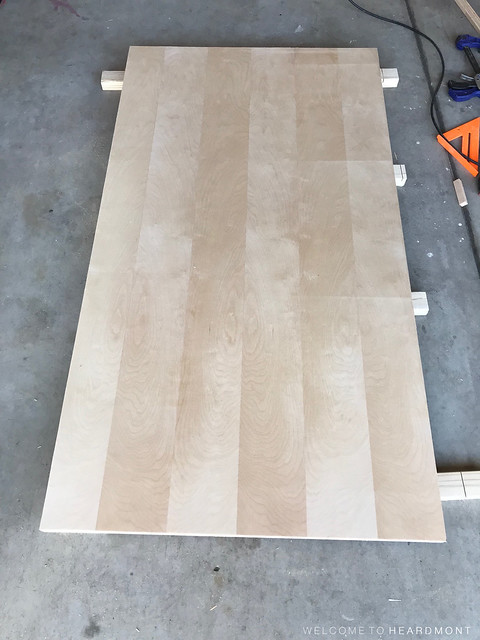
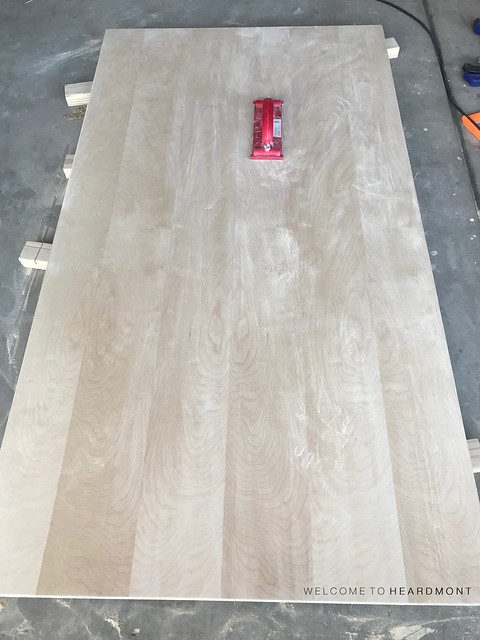
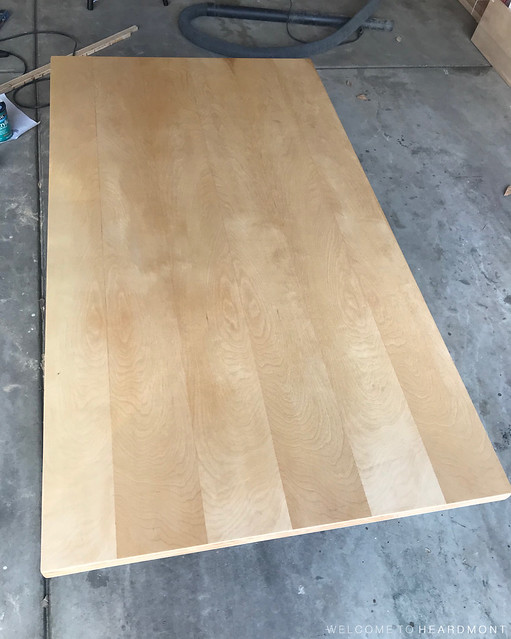
First, I purchased a 4’x8′ sheet of birch plywood from Home Depot. It was just under $50, and the employees cut the sheet down to size for me. Our table ended up being 37″ x 67″ and the initial cut was about 39″ x 69″. (Get the piece cut to about 2″ wider and 2″ longer than you want your table to be, and KEEP THE SCRAPS.)
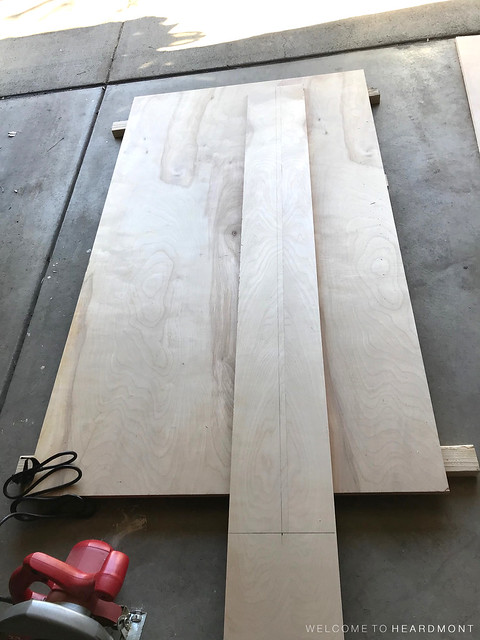
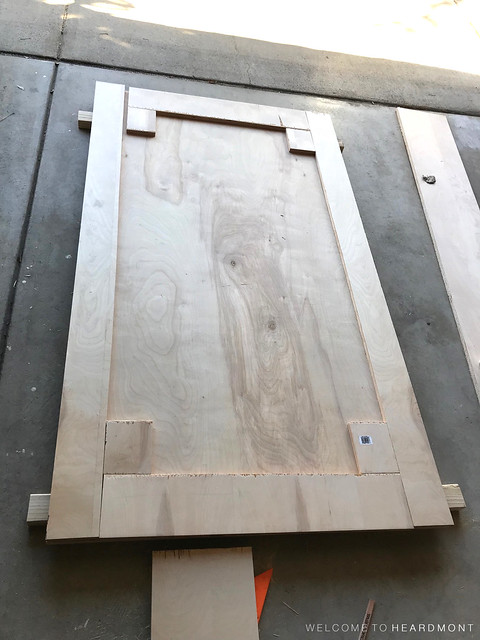
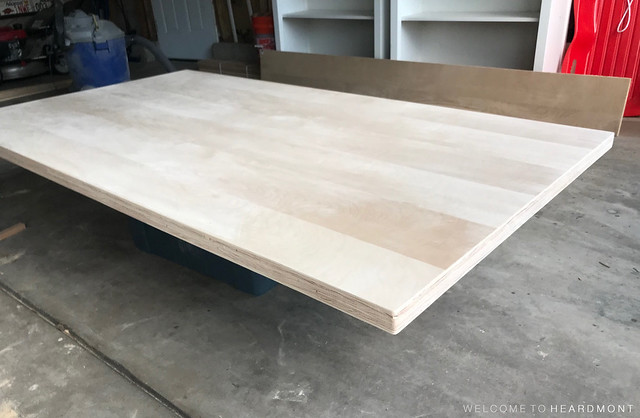
Our plan was to use the extra plywood to build a frame around the bottom of the table top for a few reasons.
- To thicken the edge of the table and make it look more substantial
- To strengthen the table top
- To provide a thicker surface for the leg screws
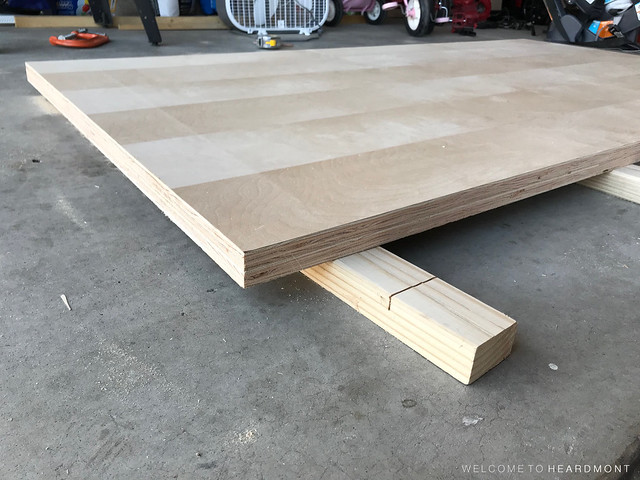
This gives an idea of how we cut strips for the long sides of the table from the long piece of scrap plywood. I believe these were about 4.5″ wide.

The majority of the cuts on this project were made with a Skil Saw like this one with a fine finish blade like this.
We knew the legs would be attached further in on the table top than our frame would allow, so we also added four scrap pieces of wood (roughly 5″ square) to the corners.
To attach the frame, we applied wood glue and added textbooks as weights while the glue dried overnight.
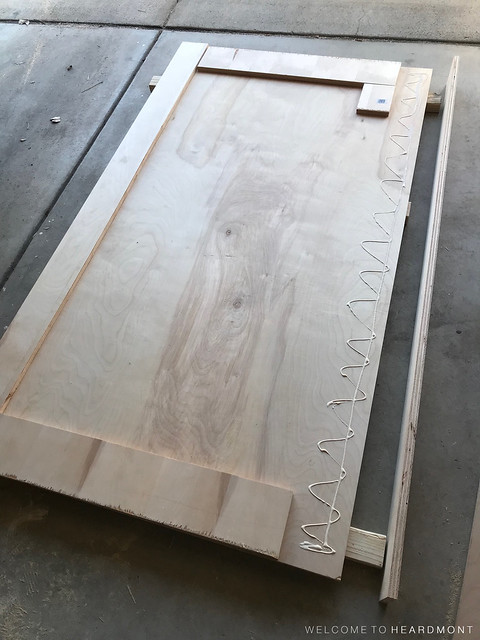
A glimpse into our college years, right here!

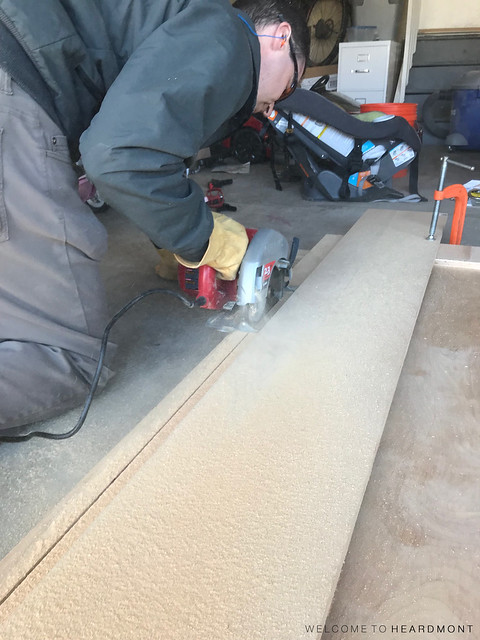
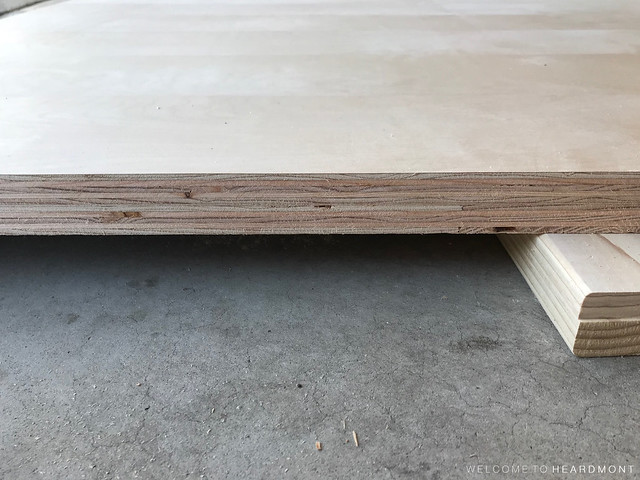
The next day, we clamped a straight board in place along one edge of the table top (to use as a guide) and used the Skil Saw to cut through both layers of plywood and create a smooth edge. We had a few areas in the wood we wanted to work around, but in general we cut an inch off each of the four sides.

Just like this!
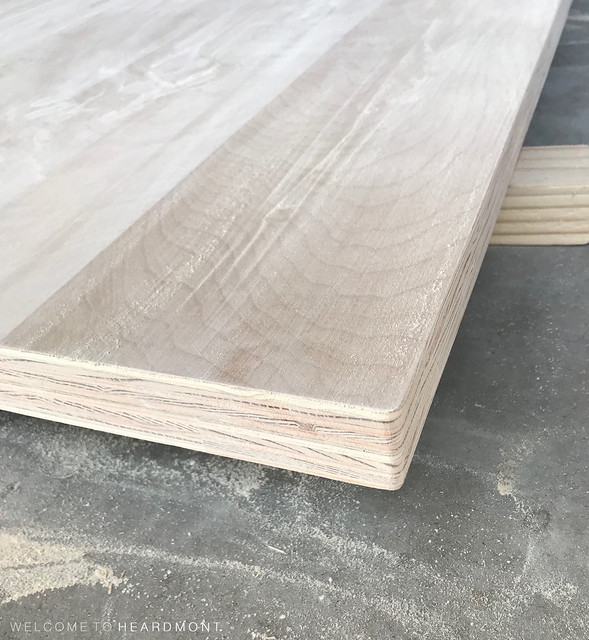
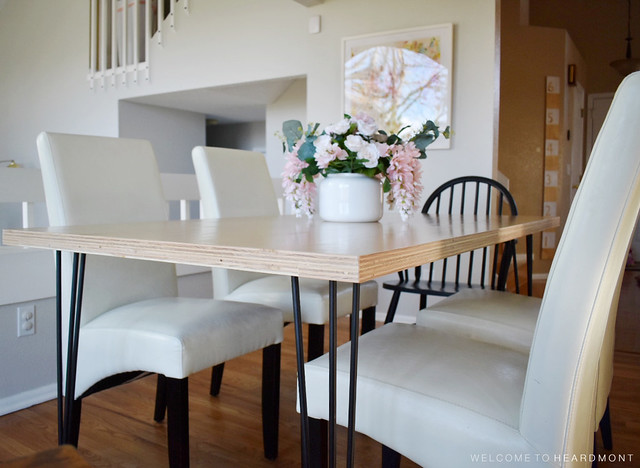
This is what the top of the table looked like after all four sides were trimmed. This particular sheet of plywood had one full veneer side and one with these veneer strips. I decided I liked this side better for our table top because it was more interesting.
Here’s a look at the edges after the cuts.
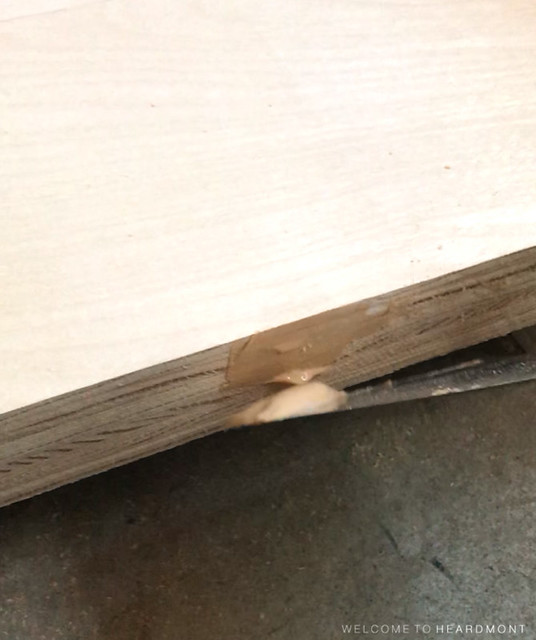
There were a few holes in the edges of the plywood, so the next step was to fill them with wood filler.
I used wood filler on any holes or gaps in the plywood on all four sides.
After the wood filler dried, I hand sanded the edges and rounded the top edge and corners with 120 grit sandpaper. I used 220 grit on the top of the table to prepare it for finishing.
Here’s the table top after sanding.
The rounded corners turned out really pretty and much safer than the sharp corners left by the Skil Saw.
Finally it was time to seal the table top! I used this poly and my favorite paintbrush ever to apply thin, even coats over the entire surface and around the frame on the underside of the table top.
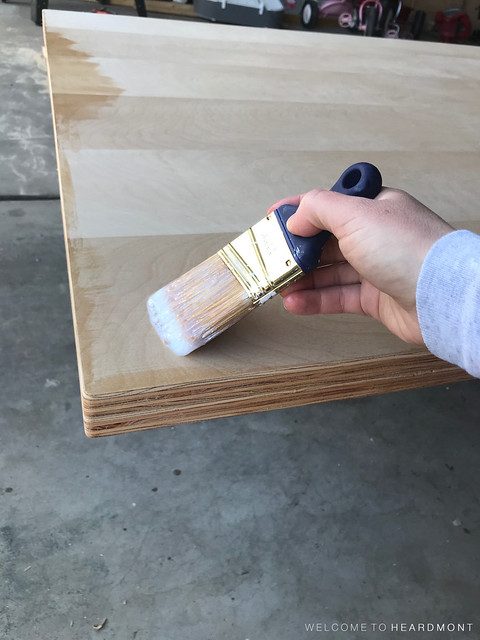
Two hours later, the table top was ready for a light sanding with 220 grit sandpaper and the second coat of poly.
I applied four coats of poly in total, sanding with 220 grit between coats. Then it was time to attach the legs.
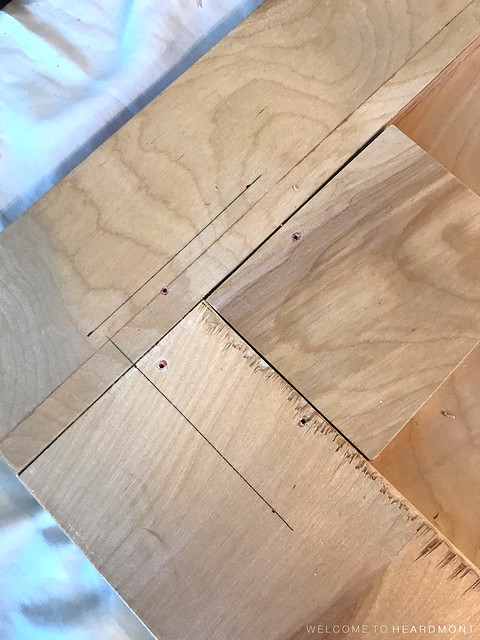
I carried the table top into our dining room and marked the screw holes for each of the four legs on the underside. Our legs were inset about 2 3/4″ from each edge.
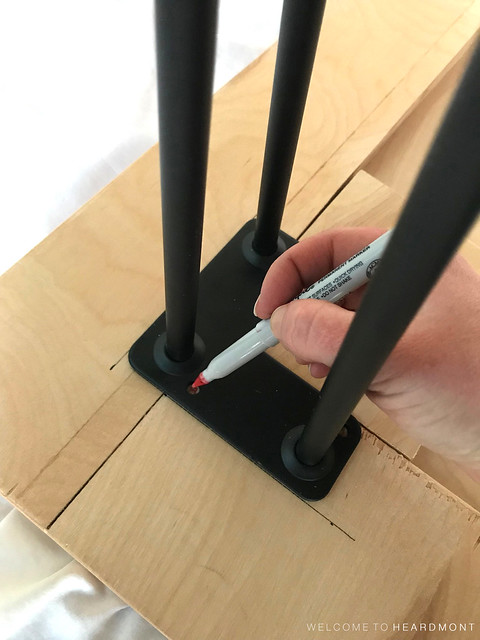
Then I predrilled each hole and attached the legs with the provided wood screws.
We ordered the 28″ heavy duty, 3 rod dining table legs in black (these from The Hairpin Leg Co.). I think our selection was perfect for the size and weight of our table top, and I love that the legs came with the appropriate wood screws and these little black rubber protector feet. The feet keep the table from sliding and/or scratching our wood floors.
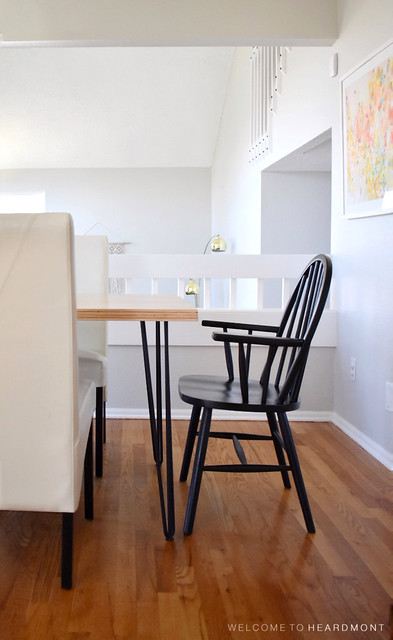
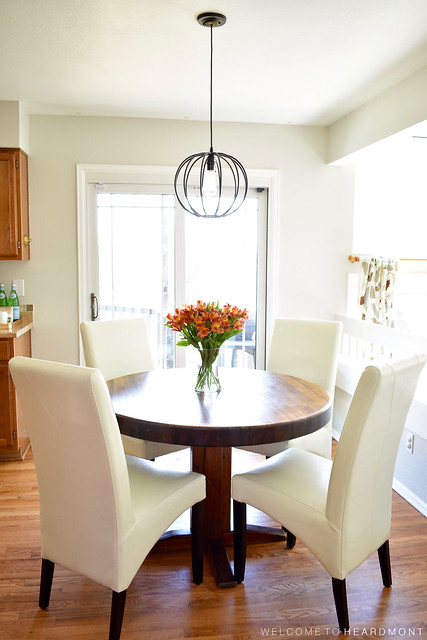
I’ve seen much thinner hairpin legs at hardware and craft stores, but now that I know how substantial the plywood table top turned out to be, I’m so glad we went with the thicker 1/2″ heavy duty legs. Here’s a look at how the table turned out!
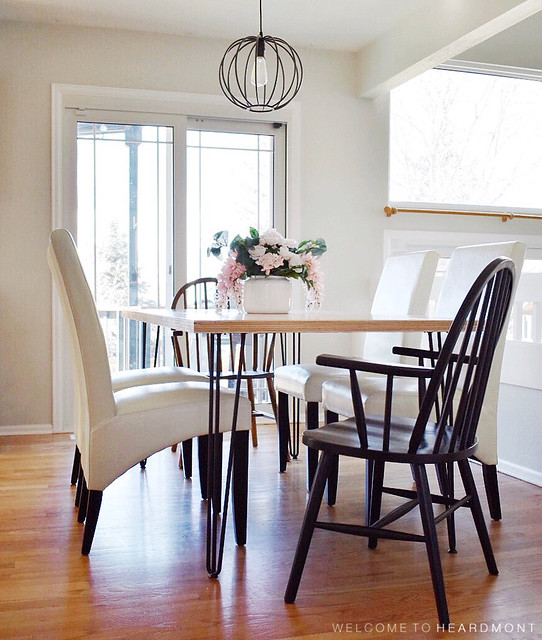
We are loving how large the table is without making the room feel crowded. It’s just the right size to seat six but could easily fit a couple extra chairs in a pinch.
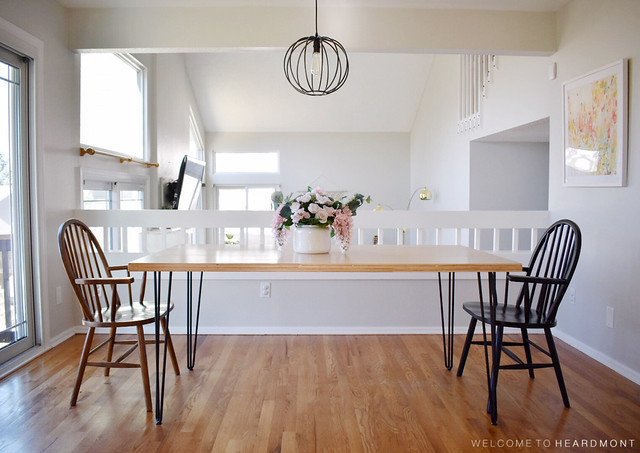
The layered plywood edge provides a bit of interest to the otherwise simple table top. I love seeing the textures and different shades of wood along each edge.
I also love how the glossy natural wood pairs with the matte black legs! They definitely make the table. Now where’s my heart-eyes emoji?

So that’s how we replaced our old dining table with one perfectly suited to our current needs. In total, this table would cost about $135-$140 to build on your own, depending on if you had the basic tools necessary already (saw, paintbrush, screwdriver and/or electric drill).
In case you’re wondering, we didn’t get rid of our old table. It’s happily hanging out as a game/craft table in our newly remodeled den, but that’s a story for another day.
What do you think of our latest DIY? I’d love to hear if you make your own!
This post contains affiliate links.