Picking the Perfect Gray

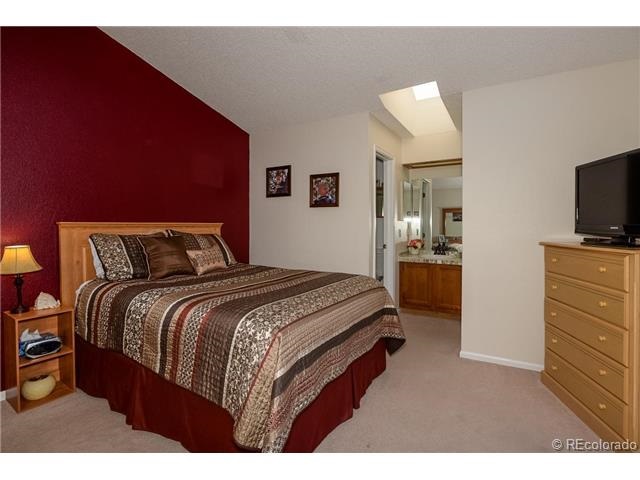
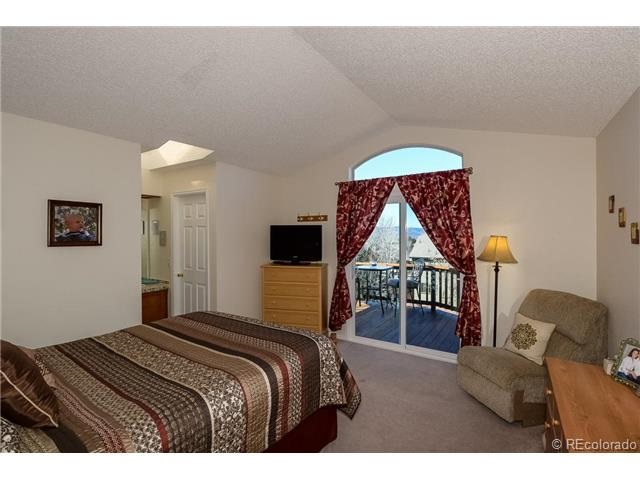
It all started with a hunt for the perfect shade of gray for our master bedroom. I wanted a gray that was almost white, not too blue, not too purple, not too tan, and not too green. I knew that finding a color fitting that description might be tricky, but I followed the rules and brought lots of paint chips home before choosing two Sherwin Williams colors to buy as samples: Agreeable Gray and Incredible White.

Buying two samples was kind of a big commitment since they were $7 each and quart-sized! I was so excited to tape those samples up on the wall, but when I saw them in the room, my heart sank.

Two Gray Samples

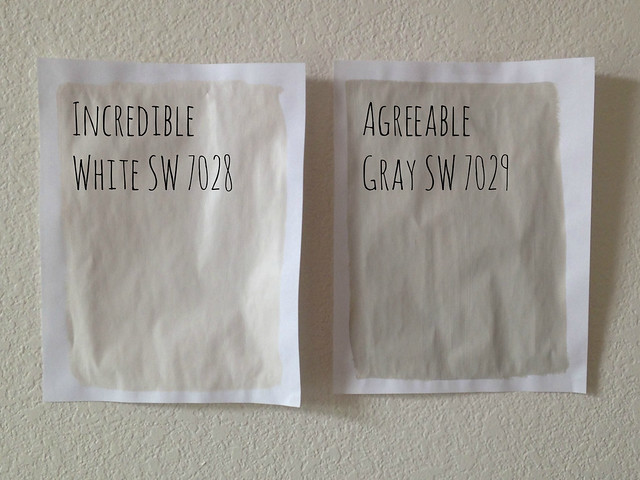
Incredible White looked identical to our current creamy yellow wall color, and Agreeable Gray looked khaki, not like the barely-there gray I envisioned.

So it was off to the paint store again for a third sample, one I thought was lighter and more blue, SW Crushed Ice.

Three Gray Samples

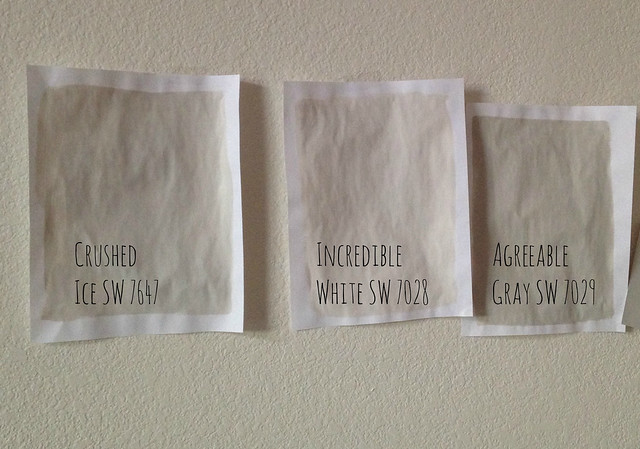
Once I had the sample up, I knew Crushed Ice was still too tan.

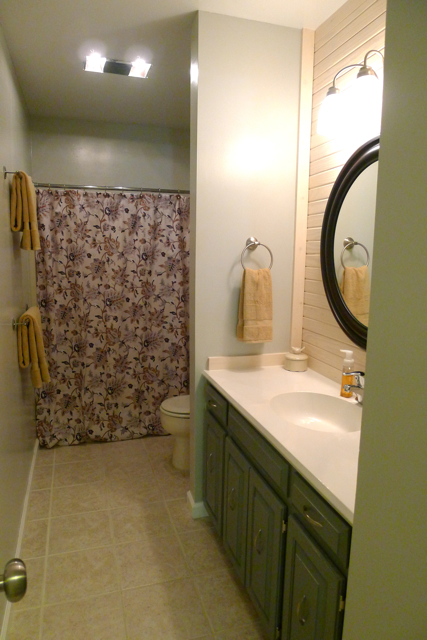
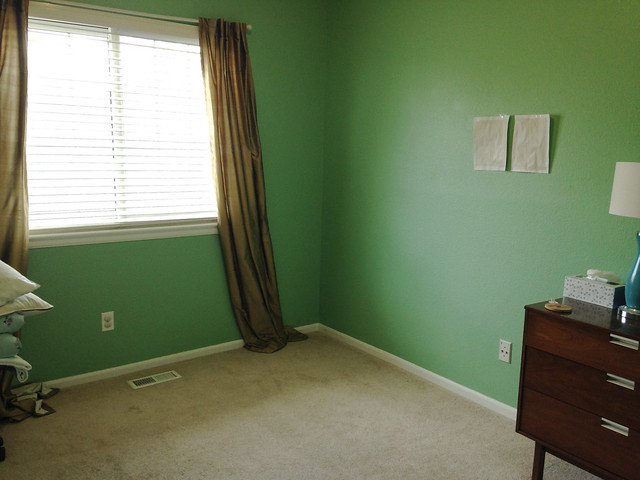
By this point, I was totally frustrated that I couldn’t find the right color and that I’d spent $21 on paint I would never use. Luckily Stephen came up with the brilliant idea to use the sample quarts to paint over the bright teal walls in our guest bedroom. You remember this room, right?

Guest Room Before

I wasn’t sure I’d have enough paint to make it work, but I figured at the very least the colors were light enough to use as a primer coat. So I did the unthinkable and (gasp!) mixed all three samples together in an empty gallon paint bucket. On Sunday afternoon, I crossed my fingers and got to work.

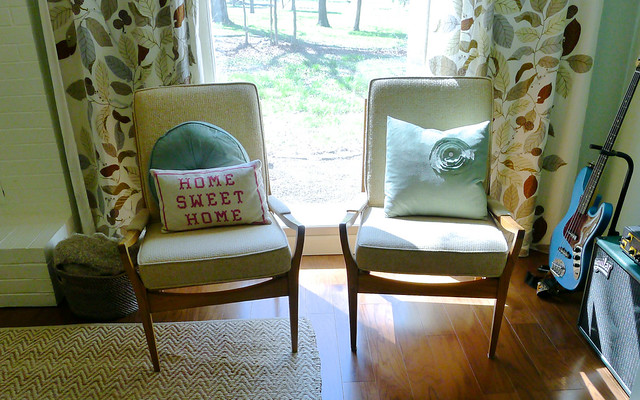
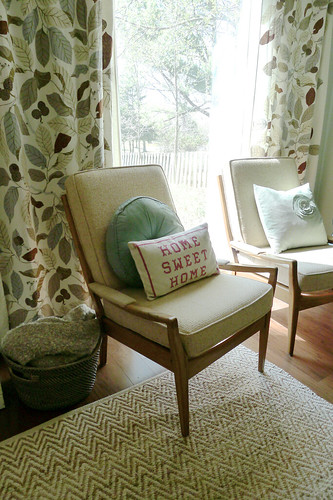
Here’s a look at the room again before I started painting.

Guest Room Before1

Guest Room Before2

Would you even believe me if I told you that the 3/4 gallon was enough to paint the entire room and it dried into the most perfect gray? Seriously, I am in love with the color in this room.

Guest Room During1

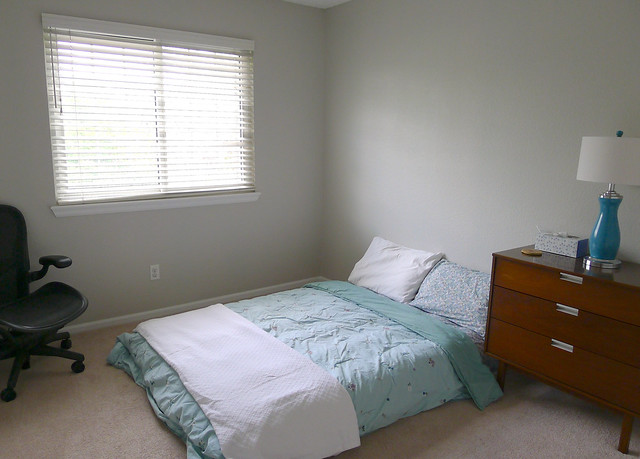
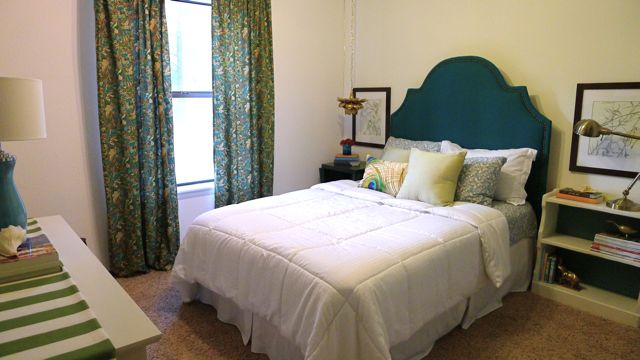
We sold almost all of our guest bedroom furniture when we moved, so this is a look at our guest room setup over Memorial Day weekend. We’ll eventually get a real bed in here!

Guest Room During2

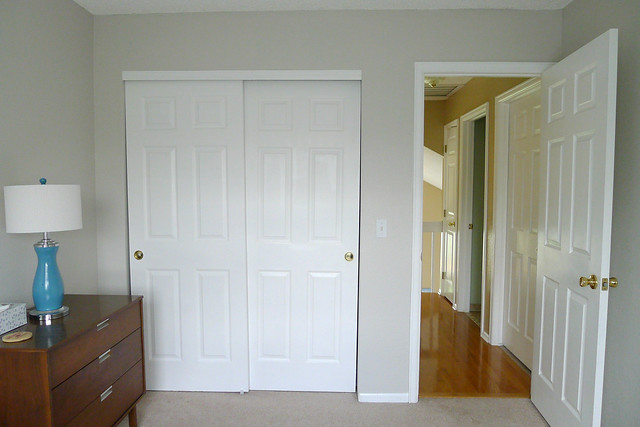
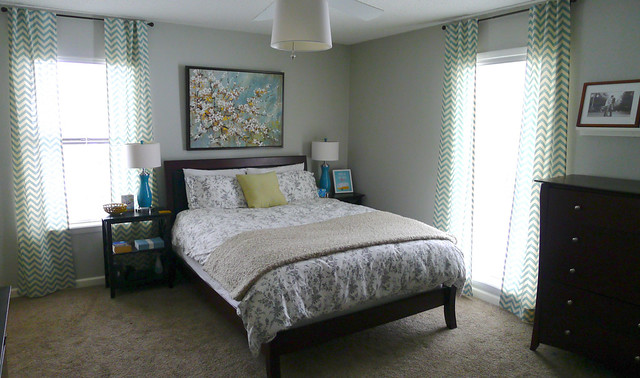
Happily, I was able to match the wall color to one of the other paint chips I brought home, Silver Drop by Behr.

And that’s where the story comes full circle. We now have the perfect gray to use in our master bedroom! On to the next painting project!

Posted in Before and After, Paint | Comments Off on Picking the Perfect Gray

Hunting for Vintage Furniture

A couple weekends ago, Stephen and I packed up the babe and headed up to Wheat Ridge, CO to check out a vintage dresser we’d spotted on Craigslist the night before. We didn’t know much about Wheat Ridge beforehand, but a quick internet search for “vintage furniture” in the Denver area showed that this unassuming city was a treasure trove for antique and vintage furniture lovers like us!

We hit up four shops on our way: Garage Vintage (in the Denver Arts District), modmood and RETRO Consignment, Mid Mod Vintage Furniture, and Wheat Ridge Used Furniture.

We had a great time soaking up the midcentury goodness even though some of the pieces we found were completely out of the budget. Let me tell you, walking through rows and rows of vintage furniture is my kind of heaven!

RETRO

source

What’s even better, our shopping trip was a success! A random stop at Wheat Ridge Used Furniture yielded this rock-solid butcher block kitchen table.

Butcher Block Tbl

Plus, we decided to pull the trigger on this midcentury dresser in excellent condition.

6 Drawer Dresser

We were in desperate need of a kitchen table, and since our master closet is tiny, the dresser has added tons of storage in our room. I snagged the dresser photo from the Craigslist post, but I hope to give you a peek of it in our bedroom soon!

Where do you go for great furniture? I think we might be making more treks to Wheat Ridge in the future!

Posted in Furniture, kitchen | Comments Off on Hunting for Vintage Furniture

DIY Growth Chart

I tackled a quick DIY project a few weekends ago. It was one of those rare times when the weather was nice for working outside, the baby was napping, and I had all my supplies on hand and ready to go as soon as her head hit the pillow.

Up until Libby turned one, we had taken a photo of her sitting in her crib every Saturday. 52 weekly photos are a pretty amazing sight to see all in one place (we displayed them at her first birthday party), but we decided monthly photos were a little more attainable after the first year.

Weekly Photos

Now that Libby’s standing (and walking), I thought a growth chart would be a great background for her monthly photos. I love the more intricate ones I’ve seen online, but this one had to be accomplished during nap time, so I went a bit more simple.

I started with a six foot long 1×6 pine board. I decided to hang it about six inches off the floor, so I marked off every six inches along the board and knew my first line would be one foot above the floor. Then it was just a matter of printing out the numbers 1 through 6 and tracing them onto the board before filling in every other stripe with white paint.

Outlined 2

A quick tip for tracing numbers, use a ball point pen and press down on the number through the paper to make an indention in the wood without actually writing on it. This indention makes it easier to keep the paint inside (or outside) the lines, and there’s no erasing or trying to cover up pen or pencil marks as you go.

Outlined 3

Once the white paint was dry, I sprayed the board with a quick coat of clear matte paint to seal it. Then Stephen drilled two pilot holes through the board and into the stud in the wall in our entryway and hung our height board up!

Growth Chart

Here’s our little love bug at 13 months, showing it off!

13 Month Photo

When we were kids, my parents marked our heights on the kitchen door frame. Eventually they had to transfer the heights to a board so they could put a new coat of paint on the trim. I figured this growth chart would save a few steps down the line, and I love how it turned out!

Have you made something similar?

All photos: © Meredith Heard

Posted in Crafts | Comments Off on DIY Growth Chart

Saying Goodbye to Our First Home

I wanted to write a quick post to share the final after photos from our first place. We sold our house ourselves and used these as our listing photos. You can see the before photos for each of these rooms on the Our First House page.

Outside, we replaced the gutters and painted the brick and wood siding green.

Exterior After

The DIY sunburst mirror in our entryway was one of my favorite projects.

Entryway Console

In the kitchen, we painted cabinetry, replaced the appliances and floors, and added the Ikea island (it stayed with the house):

Kitchen After

Our dining room stayed pretty neutral, but we loved our DIY picture ledges and chandelier. We kept the chandelier and replaced it with a different fixture before we moved.

Dining Room After

Our living room felt significantly less cave-like than when we first bought the house!

Living Room After

In the master bedroom, new carpet and paint made a huge difference.

Master Bedroom with Blue

Here’s a peek at our DIY-everything master bath.

In retrospect, our master closet was really big! Our new master closet is TINY.

The guest room was sort of a catch-all room, but the DIY curtains and headboard pulled it together.

Whole Room

We had fun putting the guest bath together, and it was really an inexpensive makeover.

Guest Bath After

And finally, one of my favorite rooms ever, the nursery.

Nursery Left Side

Nursery Right Side

After six years of DIY projects at this house, it was sad to say goodbye! We’re really happy for the family that bought it though, and luckily we’re not lacking for a to do list at our new place. On to the next project!

Posted in Before and After | Comments Off on Saying Goodbye to Our First Home

Heardmont II: The Before Photos

Hi Friends! Look who’s blogging again!

I thought it was high time I checked back in on the old blog to give you all an update on what’s been going on with the Heard family. We are all doing great – happy, healthy, and enjoying spring with our favorite one year old. We’ve seen a lot of change over the past year, but the biggest change by far was a cross-country move from Arkansas to Colorado!

RMNP Diamond Lake

Stephen accepted a new job in the Denver area last fall, so we packed up our house, moved into a rental near his new company, and put our house in Arkansas on the market (in that order).  We spent the fall hiking every weekend, making friends, and generally diving in to life in Colorado. Luckily, our old home sold quickly, so this spring we started looking for a new place to call home in a ‘burb south of Denver.

Let me tell you, the real estate market out here is crazy! For 2-3 months we looked at homes the day they came on the market, usually in the company of more than one other buyer, and wrote offers above list price only to be beat out by even higher bids. Our realtor and I saw our new house while Stephen was in Japan for work, and I had to make the offer without him because we knew it would be gone by the time he got back.

Closing Day

We closed on our home (we’re calling it Heardmont II) in March and have been slowly moving in and making it feel like home. The DIY projects were few and far between all winter, but I have a list to tackle this summer, assuming baby girl keeps on being a good napper!

Here’s a quick tour of how the home looked when we saw it for the first time.

The main level of the house consists of the front living room, dining room and eat-in kitchen. We didn’t know how we’d use the formal living room at first, but it has become a library/play room and is where we spend most of our time during the day.

Living Room Before

Dining Before

Our new kitchen has about twice the cabinet space as our old one. It’s so nice to be able to spread out!

Kitchen Before

Breakfast Nook Before

The kitchen overlooks the covered back deck and sunken family room.

Covered Deck Before

Family Room Before

(Can you say BLUE?!)

Behind the den is a small laundry area and half bath along with doors leading to the garage and unfinished basement.

Upstairs are two kids bedrooms and a full bath.

Nursery Before

Guest Room Before

Guest Bath Before

And up a few more stairs is the master bedroom and bath with our own private deck and views of the Rockies!

Master Bed Before

Master Bed2 Before

Master Bath Before

This view was what sold us on the house!

Master Deck Before

There are things that we’d love to change immediately but will have to wait (like the exterior color scheme) and others that we tackled the first week (like swapping out window treatments), but overall we’re loving our new home.

I hope you’ll read along as I share how we’re DIY-ing our second house into a home. I’ll be back soon to share a few projects we’ve tackled so far!

First Photo: © Meredith Heard
Second Photo: © Meredith Heard

Other Photos: © REcolorado

Posted in Before and After | Comments Off on Heardmont II: The Before Photos

My First Mother’s Day

Happy belated Mother’s Day to all you moms out there! I was so happy and excited to celebrate my first Mother’s Day, and Libby and her daddy made my weekend very special.

Stephen came home Friday with a few gifts – a precious locket, a “home-grown in Arkansas” tee, and a pecan roll (he knows me well) – and a very sweet card. I nibbled on my pecan roll and then we headed out for a nice long walk in the pretty weather and a run to the store. When we got home, I walked into the kitchen and was shocked to discover my pecan roll was missing and our lab Molly had a very guilty look on her face. I guess Molly likes pecan rolls just as much as her momma!

Mothers Day Gifts

We didn’t have any set plans all weekend, but Saturday morning, we decided to take a drive to Eureka Springs for the day. We arrived in town just in time for an awesome lunch at Oscar’s Cafe. I love this picture of little L eyeing my sandwich!

Oscars
Downtown Eureka

We spent some time driving around downtown and then headed over to Turpentine Creek Wildlife Refuge, a big cat rescue just outside of town. It was hot and sunny for our tour so Libby stayed in the shade from her stroller most of the time. We pulled her out for a few quick pictures – her first time seeing lions and tigers and bears (oh my!).

Turpentine Creek

Afterwards we stopped for some ice cream and spent some time in the shade.

S+L getting ice cream

On our way home we stopped by War Eagle Mill. The mill and its grounds are home to a huge craft fair every fall, but this was my first time visiting without hundreds of crafters and shoppers present. We saw a fisherman pull a huge bass out of the creek then checked out the gift shop and got a magnet to commemorate the visit.

War Eagle Mill
S+L at War Eagle

Stephen cooked an awesome dinner that night.

Mothers Day Dinner

Sunday we took Libby to church (poor baby isn’t a fan of the organ, but she mostly slept through the service). For lunch we tried a new Fayetteville restaurant, The Farmer’s Table. The restaurant just opened in an old renovated home on the south side of town and features locally sourced and organic ingredients. We had a great meal!

First Mothers Day
Farmers Table

The rest of the day was low key with a visit from friends in town from Colorado, dinner at home, and a movie on Netflix. Just how I like to end my weekend. All in all, we had a wonderful time and I felt so special and appreciated all weekend. I’m so lucky to have Stephen and Libby and am thankful they made me a mom.

Posted in Babies, For Fun | Comments Off on My First Mother’s Day

Pregnancy Journal

Before Libby was born, Similac sent us a bunch of samples and coupons, one of which was a credit for a free photo book from Shutterfly. I thought a pregnancy journal would be a great way to round up my weekly pregnancy photos, so I started one.

A few weeks after our little girl’s arrival, I put the finishing touches on the 8×8 book. Here are a few of my favorite pages!

Journal Cover

Journal 1st Tri

Journal Fall

Journal 2nd Tri

Journal Showers

Journal 3rd Tri

Journal Christmas

Journal Nursery

I’m proud of myself for actually finishing this book and getting it ordered (I have a half-finished book from our honeymoon five years ago that may or may not ever get printed). I’ve finally figured out the key to successful photo albums for me is spending a little bit of time on them every few days or weeks so I’m not trying to sum up 9 months in one sitting. With that in mind, today I started Libby’s first year photo book (tear)!

I’ll be back soon with more updates!

Posted in Babies, My Pregnancy | Comments Off on Pregnancy Journal

New Pillows and Old Chairs

After my c-section, we had to get a little creative with our furniture so I could hold Libby and still support myself when sitting. On the couch, we added a couple of Euro pillows which have made it much easier to prop myself up straight and do all the necessary baby things. Like nursing. And cuddling. And burping. And did I mention cuddling?

I had these 25″ pillow forms from Ikea stored away in a closet. We used just the bare forms for a few weeks before I decided to stop playing with fire (aka baby spit-up) and sew some covers for them. The green stripe fabric is from Ikea – it had a former life as a table runner in our kitchen. I didn’t have enough for both sides of the pillows, so the backs are made from a tan drop cloth.

Green Stripe Pillows

I sewed these envelope-style pillow covers in an afternoon with the same method I used in this tutorial. I’m happy with how they turned out – the green and white stripe is so very springy!

Green Stripe Pillow

I also wanted to share one other recent change to our living room. My mom is in the process of downsizing and passed along these awesome midcentury chairs to us. They were originally my grandparents’ and I think it’s neat that they’ve been in three generations’ homes so far.

Gma Chairs

Maybe Libby will want them one day!

Midcentury Chair

Have you made any spring updates lately?

Posted in Furniture, Home Decor, living room | Comments Off on New Pillows and Old Chairs

DIY Changing Pad Covers

As I was putting together Libby’s nursery, I sewed two changing pad covers for her dresser. One was light pink and the other was a coral color – both fabrics were Kona solids from JoAnn. I used this tutorial which calls for one piece of 48″x32″ fabric and a yard of elastic, and the process seriously could not have been easier.

Pink changing pad Coral changing pad

The only problem? Around here, we’ve been known to dirty up both covers in one day. (Ah, the joys of parenthood!)

Yesterday I dug through my fabric stash while a certain someone was napping and whipped up three more covers.

Floral changing pad
{Wildwood by Erin McMorris from Fabric.com}

Mint changing pad
{Mint cotton from a friend – I believe from JoAnn}

L on changing table
{white pinstripe cotton from Hobby Lobby}

As you can see, our cutie pie woke up just in time to try out cover number three. I think she approves!

L close-up

Posted in Babies, nursery | Comments Off on DIY Changing Pad Covers

42 Weeks – Libby’s Here!

We are officially parents of an 11-day-old little girl!  Libby was born last Saturday after 18 hours of labor and a C-Section. It wasn’t the birth experience I would have chosen, but the saying that your labor doesn’t matter after seeing your sweet baby’s face is 100% true.

Heard Fam of 2
{our last photo as a family of two}

Heard Fam of 3
{our first photo as a family of three}

42 Weeks
{taking my last “maternity” photo – 42 weeks!}

Libby 1 Week
{Libby’s 1 Week photo}

We are so happy she’s finally here and are (amazingly) getting pretty good sleep most nights. We’re changing diapers like they’re going out of style, but I wouldn’t have it any other way. We love our Libby Girl!

Posted in Babies, My Pregnancy | Comments Off on 42 Weeks – Libby’s Here!